The Best Cordless Routers and Why You Need One
Cordless tool technology has come a long way in a short time. Five years ago, I tried a first generation cordless router and hated it, thinking some tools just weren’t meant to be cordless. But I’ve been proven wrong. Today’s cordless routers can handle 90 percent of my routing tasks.
The case for compact cordless
If you own a router and are considering a second, I recommend a cordless. Light edge profiles make up most of my routing, so a compact is perfect for me, and cordless is even more appealing. I grab my full-size corded router only for heavier jobs. Compact cordless routers are also a good choice for a first router. They’ll do everything a corded compact can.
Don’t worry about run time
For five of the six routers we tested, the manufacturers claim they’ll rout at least 250 linear feet on a single charge. But run time partly depends on whether I’m trimming laminate or routing a big round-over.
With two batteries, all I need is a charger that keeps pace with the job at hand. And I can’t remember the last time I had to rout 250 feet of anything! All the routers we tested had sufficient run times and speedy charging, making this rating a nonissue for me.
Putting battery power to the test
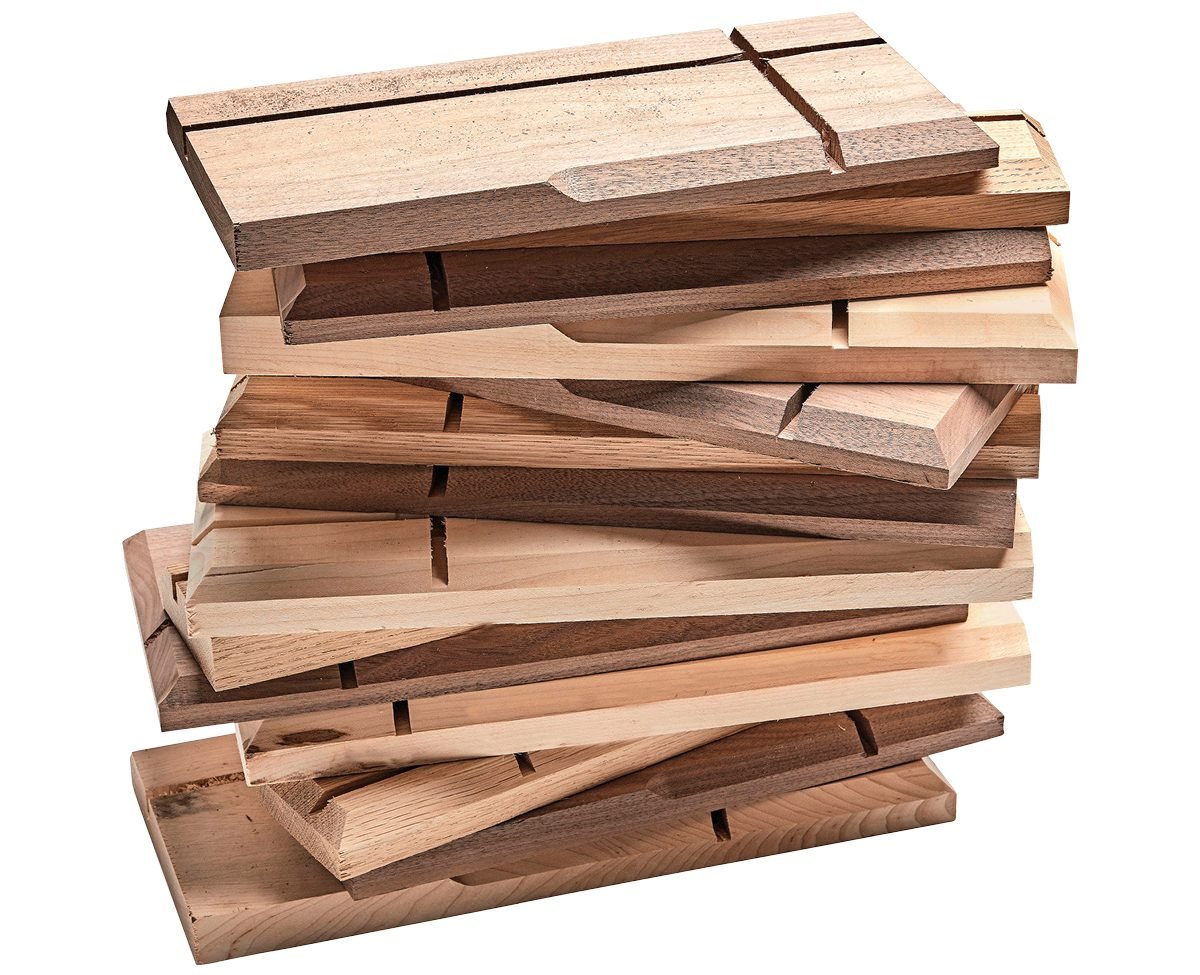
I put the battery-powered compact routers through the test shown below to evaluate their ease of use, run time and overall power. I started by cutting a 3/8-in.-deep groove and dado with a spiral bit, then switched to a chamfer bit and made a 1/2-in. profile along one edge and one end.
I made plenty of sawdust for this story! I tested the six routers by making four cuts each in three types of wood.
Features That Matter
Invest in dust extraction
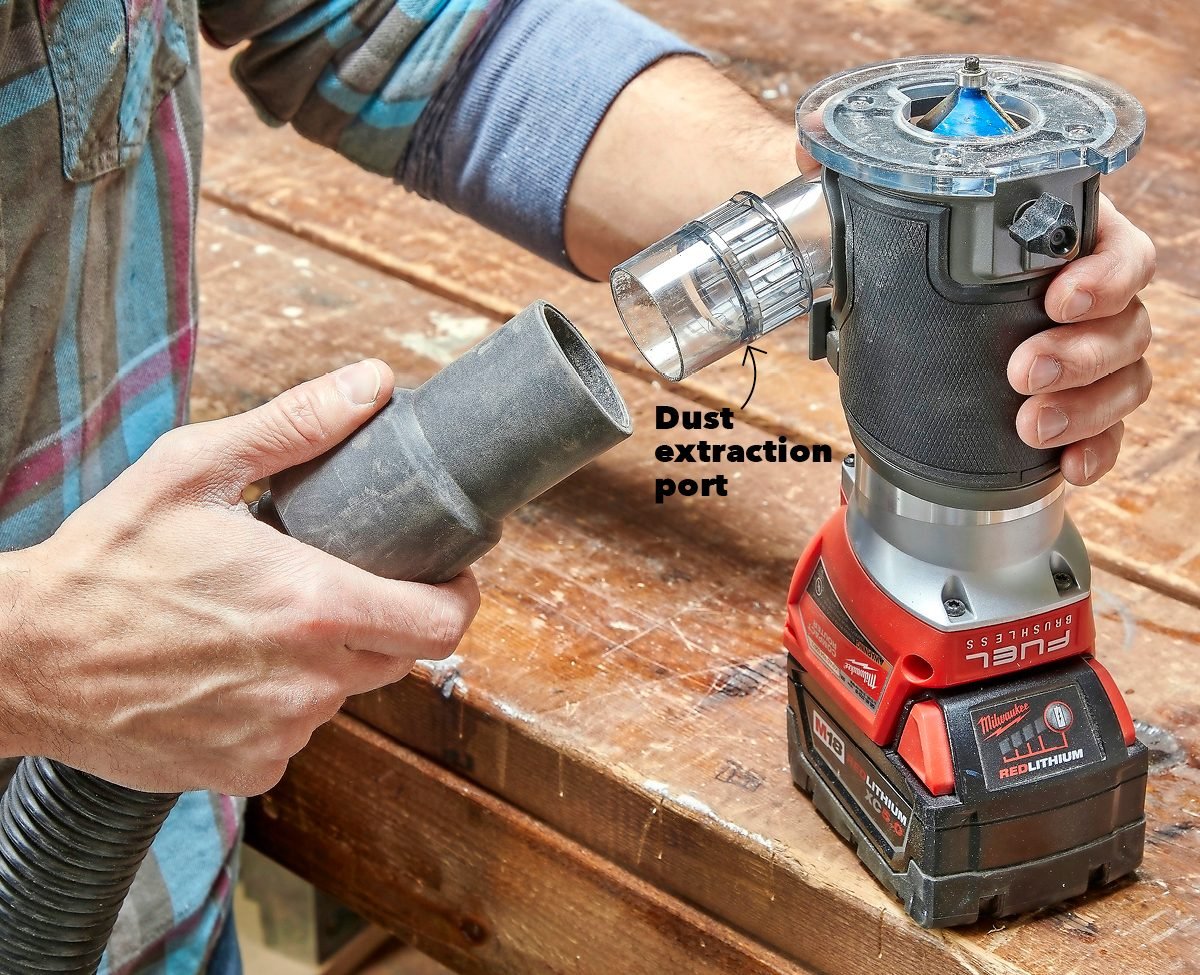
Dust isn’t just messy. It builds up while you’re routing dadoes and grooves and causes burning. To avoid this and make it easier to see what you’re doing, get a dust port for your router. Many brands include them in their kits. If yours doesn’t, it’s smart to buy one (about $15).
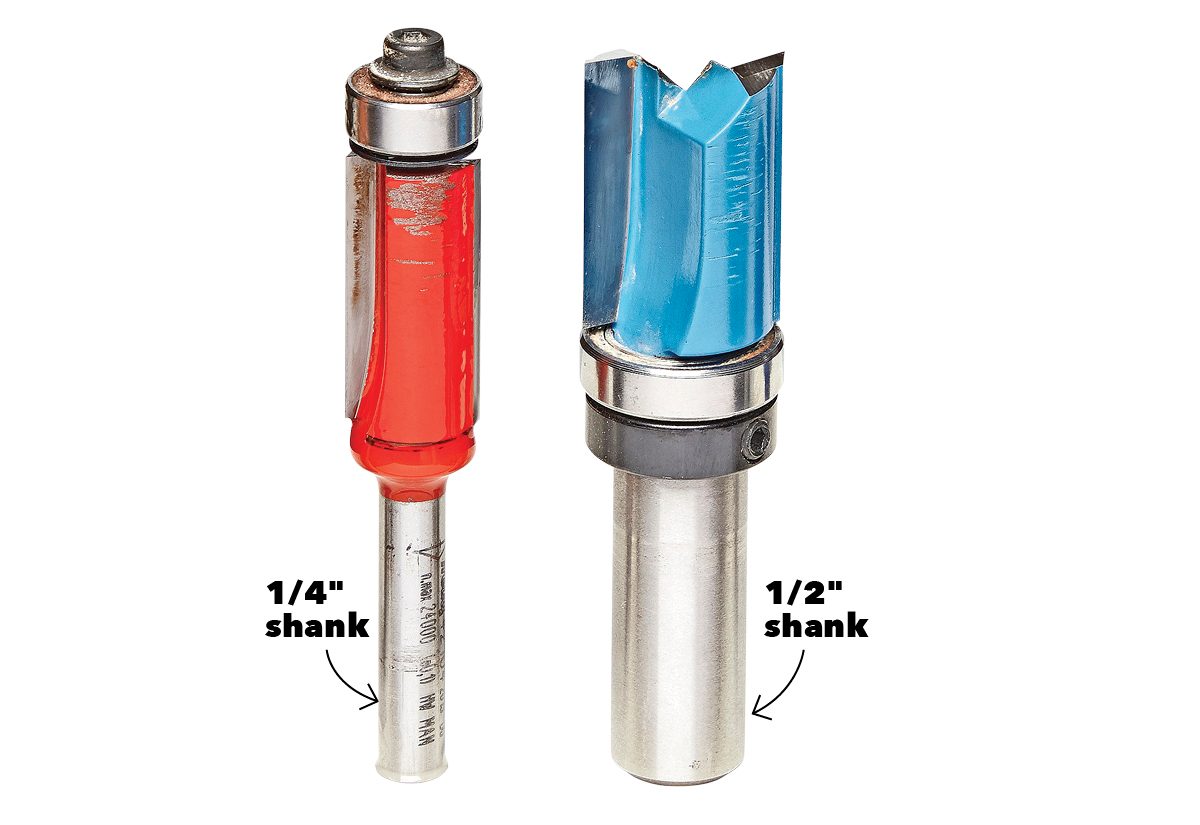
1/4-in. shanks only
Compact routers accept only 1/4-in. shank bits, which aren’t outfitted with large profile cutters. For large-profile cutters with a 1/2-in. shank, you’ll need a full-size router.
Plenty of power
When it comes to power, compact cordless routers can go toe-to-toe with their corded cousins. I tested each cordless model alongside a corded version and found no difference in power.
Consider a plunge base
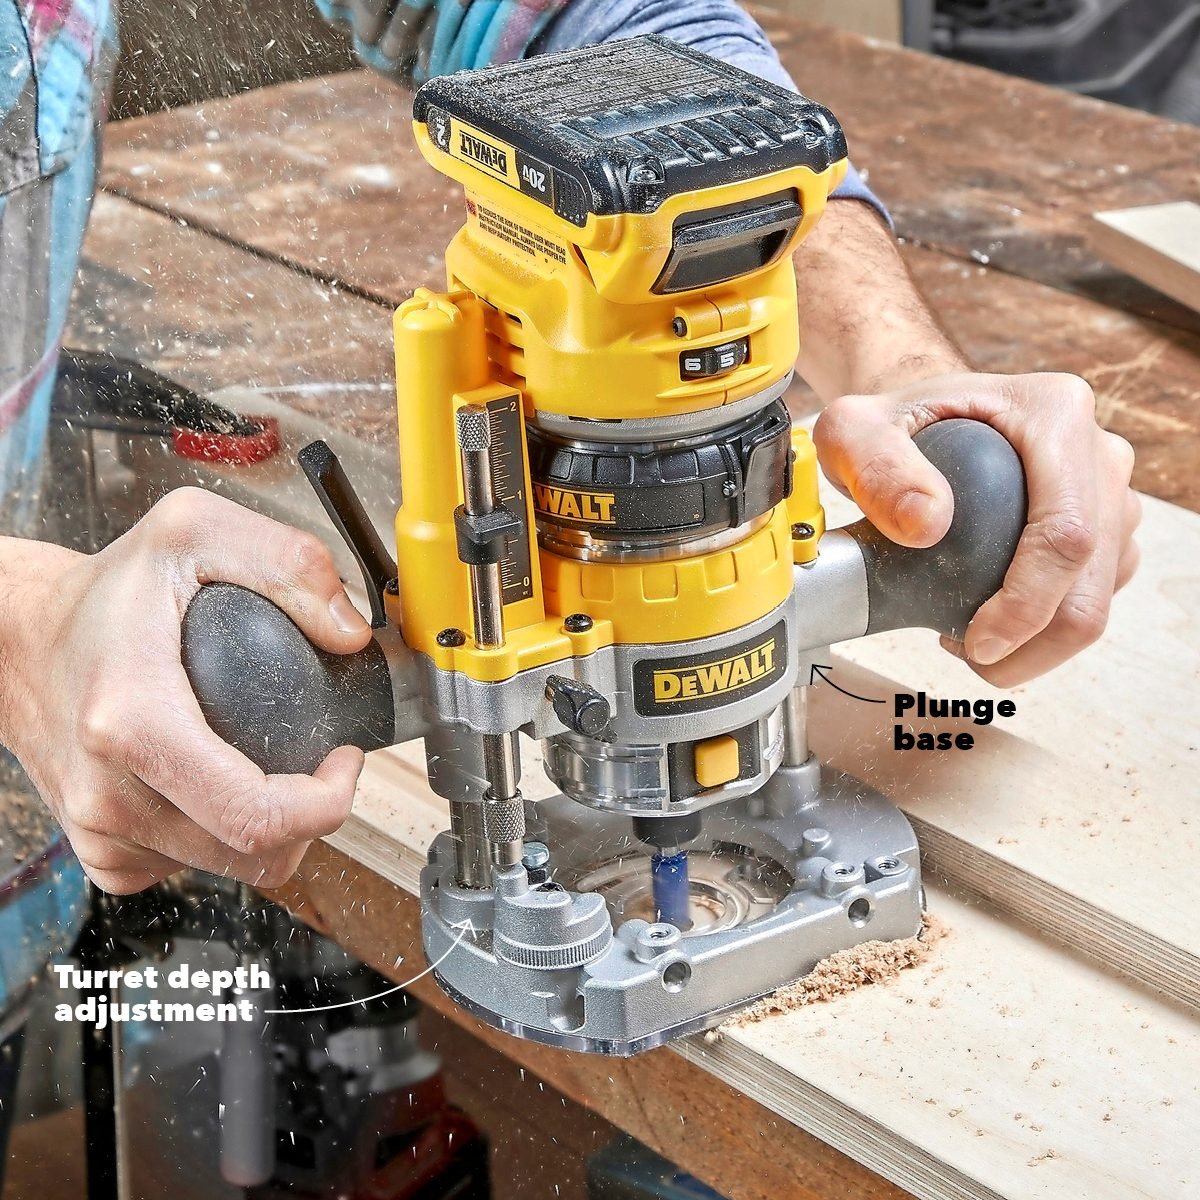
Some compact router kits include a plunge base, some brands offer one as an add-on, and others aren’t compatible with a plunge base at all.
A plunge base lets you easily rout in stages for easier cutting and a better finish. Plunge bases provide a two-handled grip for better control and an adjustable turret, which lets you adjust the plunge depth without readjusting the final depth.
Soft start, fast stop
Some compact routers instantly rev to 30,000 rpm when you flip the switch, creating a surprising kick. A soft-start feature is worth looking for, as the tool eases up to top speed for safer start-ups.
Another safety feature is an electric brake, which stops the bit almost immediately when you switch the router off. You can safely set the tool on your bench right away — no waiting for it to wind down.
Why does variable speed matter?
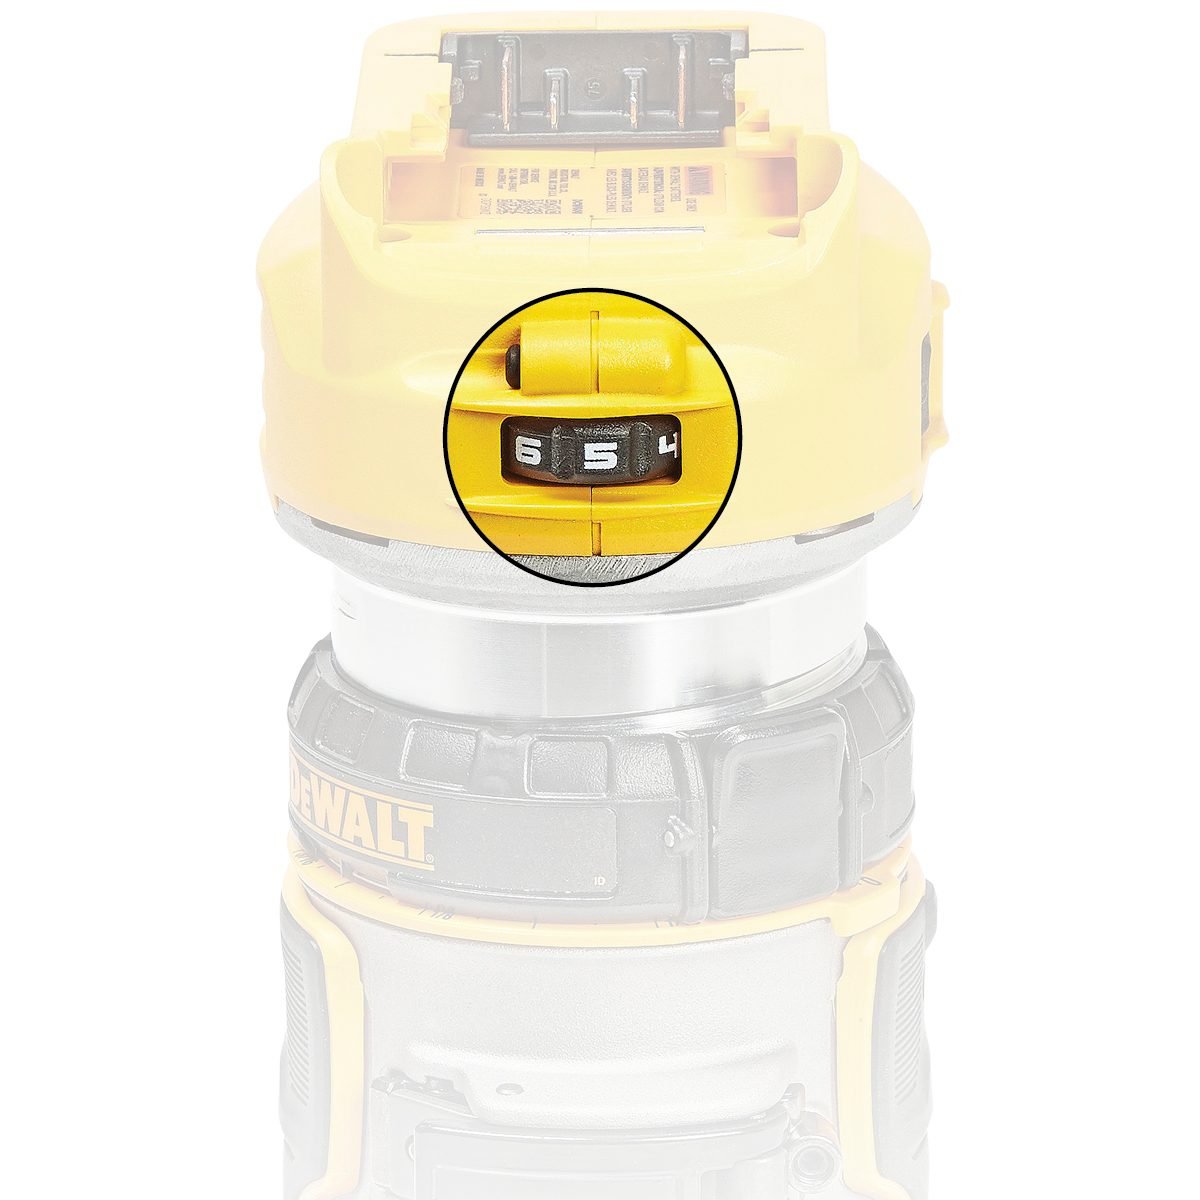
Large-profile bits should be run at a lower rpm than small-profile bits. This applies whether the bit has a 1/4-in. shank or a 1/2-in. shank. If the bit is “jumping” or burning your material, slow it down a little.
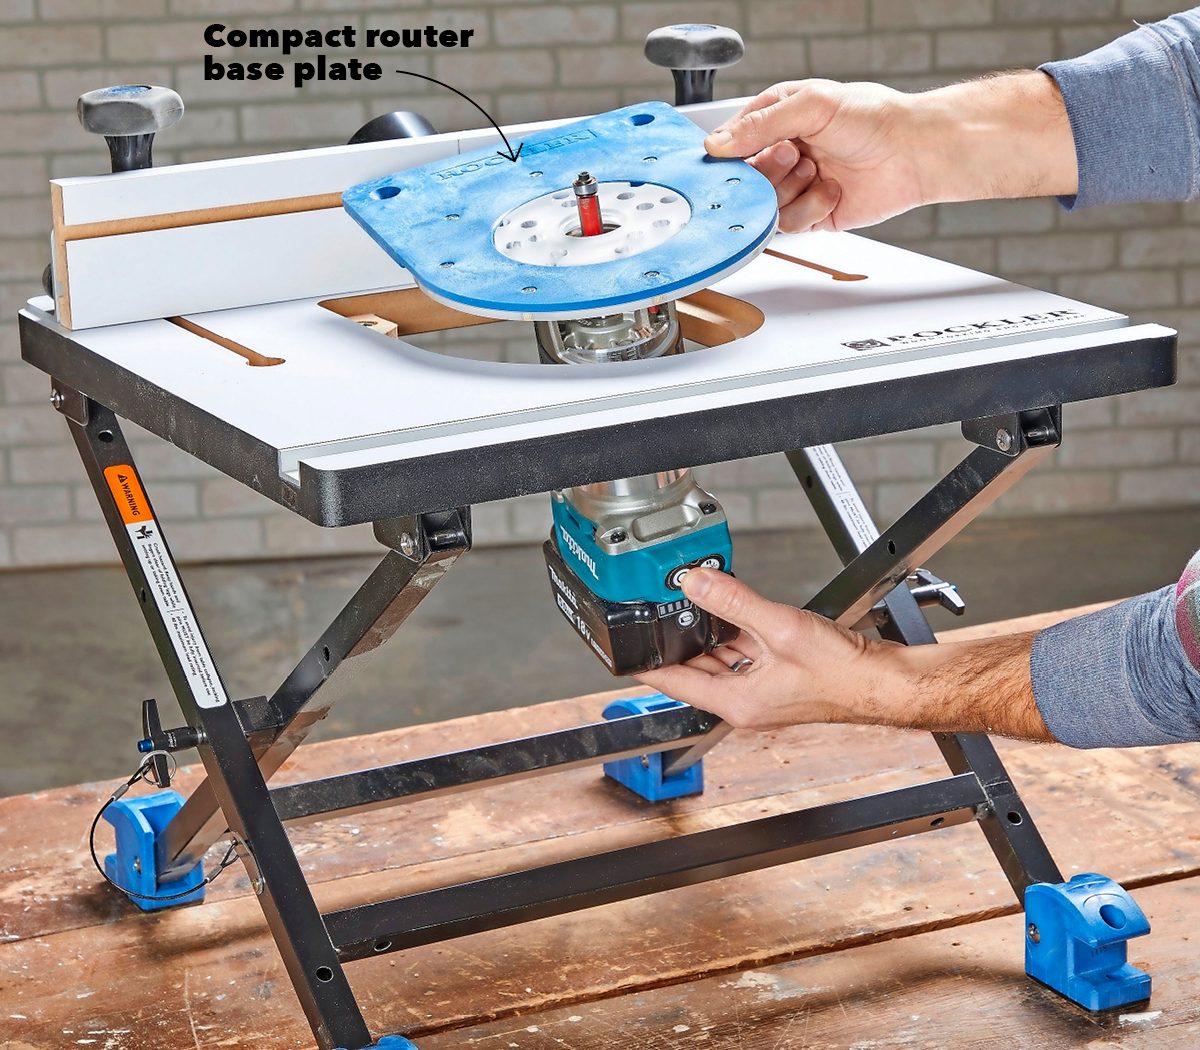
A router table is an option
A router table makes any router much more versatile. Most are made for full-size routers, but baseplates are available to accommodate compact routers. They’re a worthwhile investment.
They’re all small
In the not-too-distant past, I saw a few full-size cordless routers. But all the models I found recently are compact. A compact router can handle most jobs, so that’s not a problem for me.
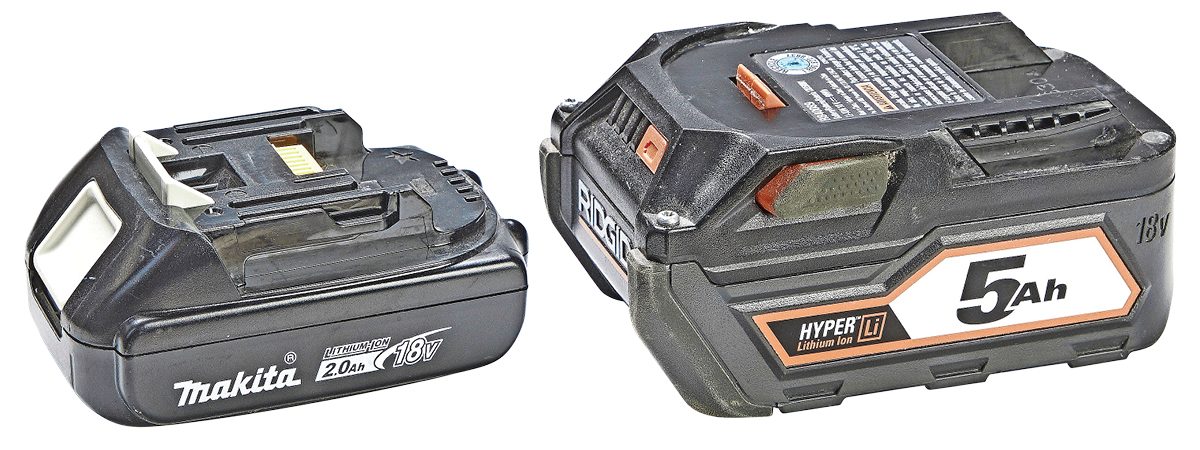
No need for a bigger battery
During my testing of these routers, I tried 5AH batteries and 2AH batteries to see if there was a power difference. There was no discernible difference. And the 2AH battery gave the router better balance; there was less of that top-heavy feeling. For this reason alone, if you have the option, go with a smaller battery.
The Routers
These routers have similar features: adjustable bases, variable speed dials and the ability to make micro adjustments. But each one has something that separates it from the rest. I paid close attention to the ease of bit adjustment, safety features, accessories and the general feel while cutting.
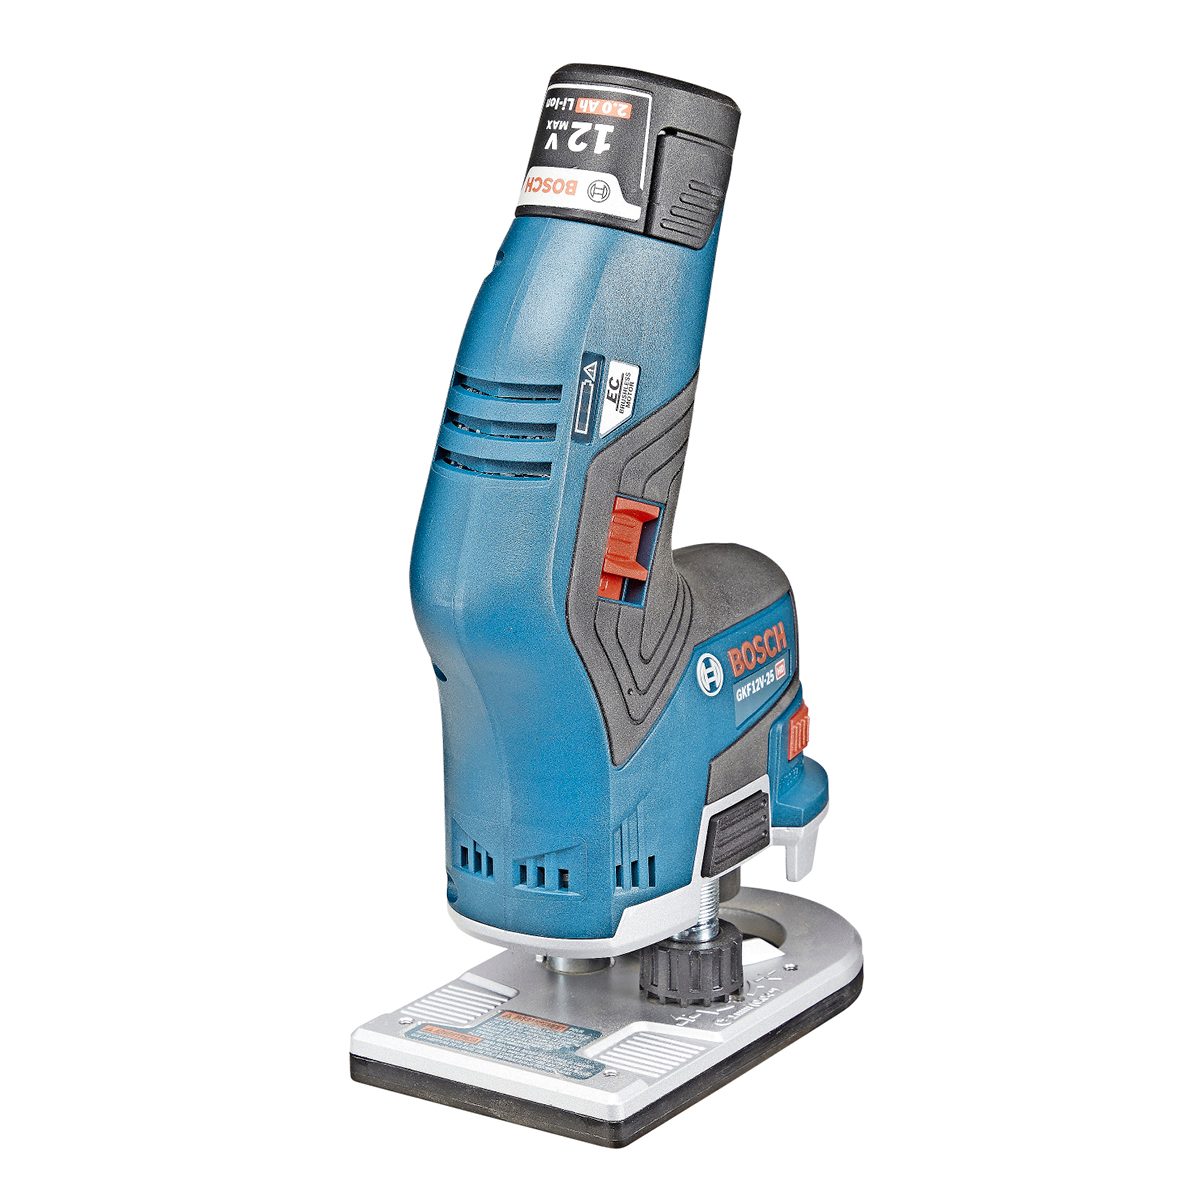
Bosch 12v (GKF12V)
$149 (tool only)
This model is the only 12V tool on this list, but it has the power to do what the 18V tools can do. It didn’t struggle with any of the cuts I made with it. One thing I really like is that the bit is offset to one side, which lets you get more of the tool on the work surface. The height adjustment is really quick and easy.
Pros:
- The tool is lightweight and compact.
- Depth adjustments are fast with a quick-release button and fine adjustment screw.
- The spindle is offset, providing lots of room for the base to rest on a flat surface.
Cons:
- The base isn’t removable.
- The tool isn’t compatible with a plunge base.
- The unique grip design takes some getting used to.
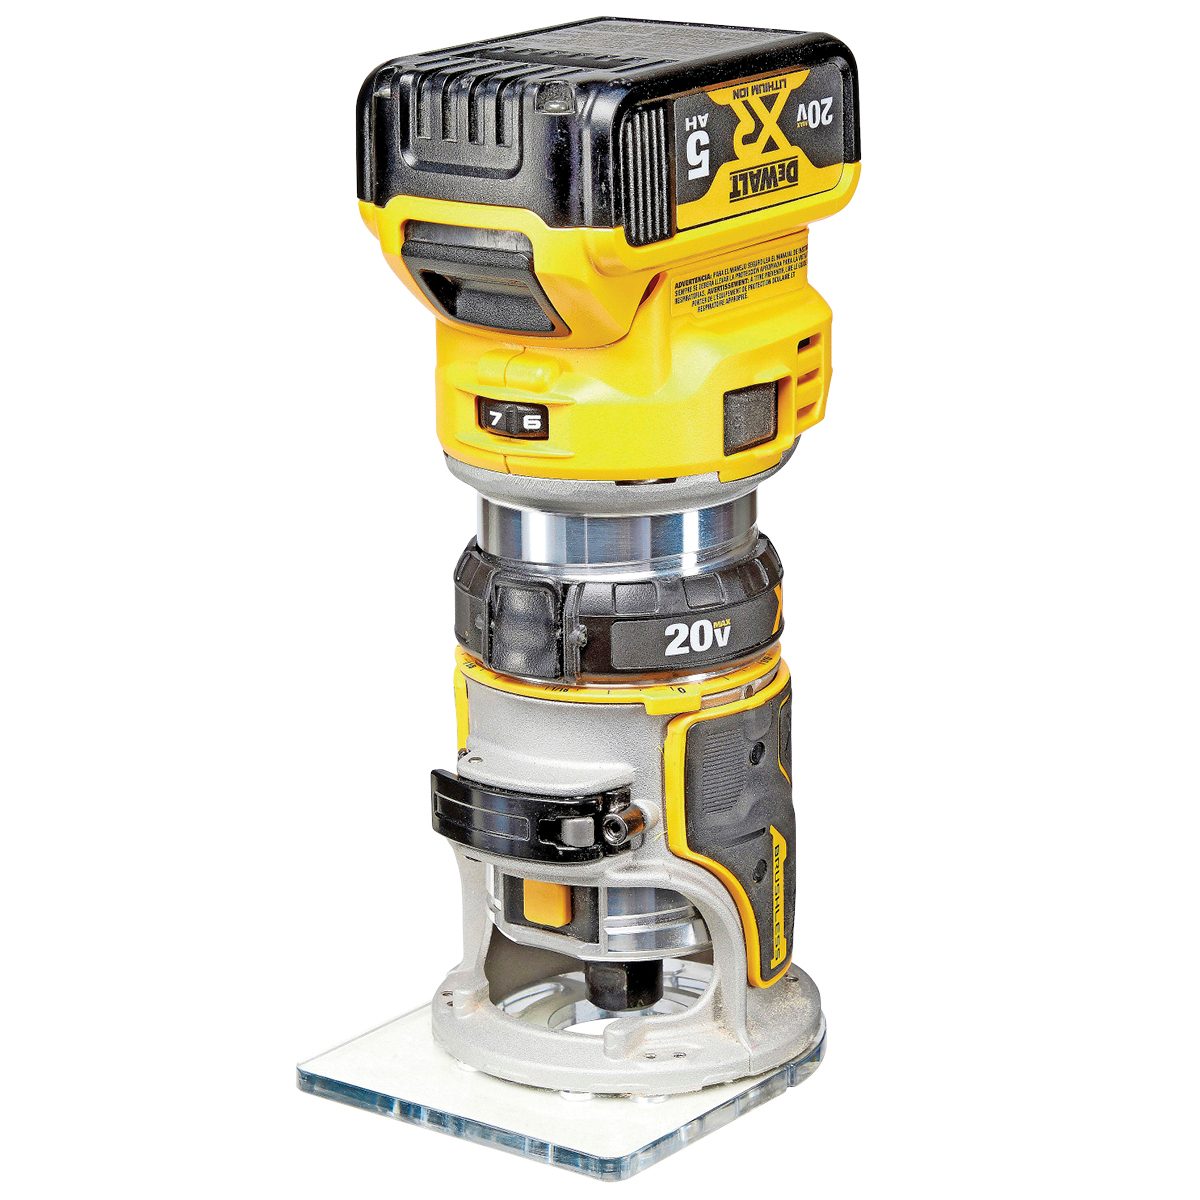
DeWalt (dcw600b)
$200 (tool only)
The DeWalt is the biggest of the bunch. In a class of compact routers, that’s not necessarily a plus. Of the six routers, it has the easiest screw collar height adjustment, and it’s accurate for macro and micro adjustments. The router cuts smoothly, without chatter.
Pros:
- The base is easy to remove, and the spindle lock button has several stops for easy one-tool bit changes.
- It has a large, squared-off baseplate for accurate routing against a fence.
- Soft-start feature and fast-acting electric brake.
- Two LEDs light the work area nicely.
Cons:
- All accessories sold separately.
- It’s the most expensive tool-only router.
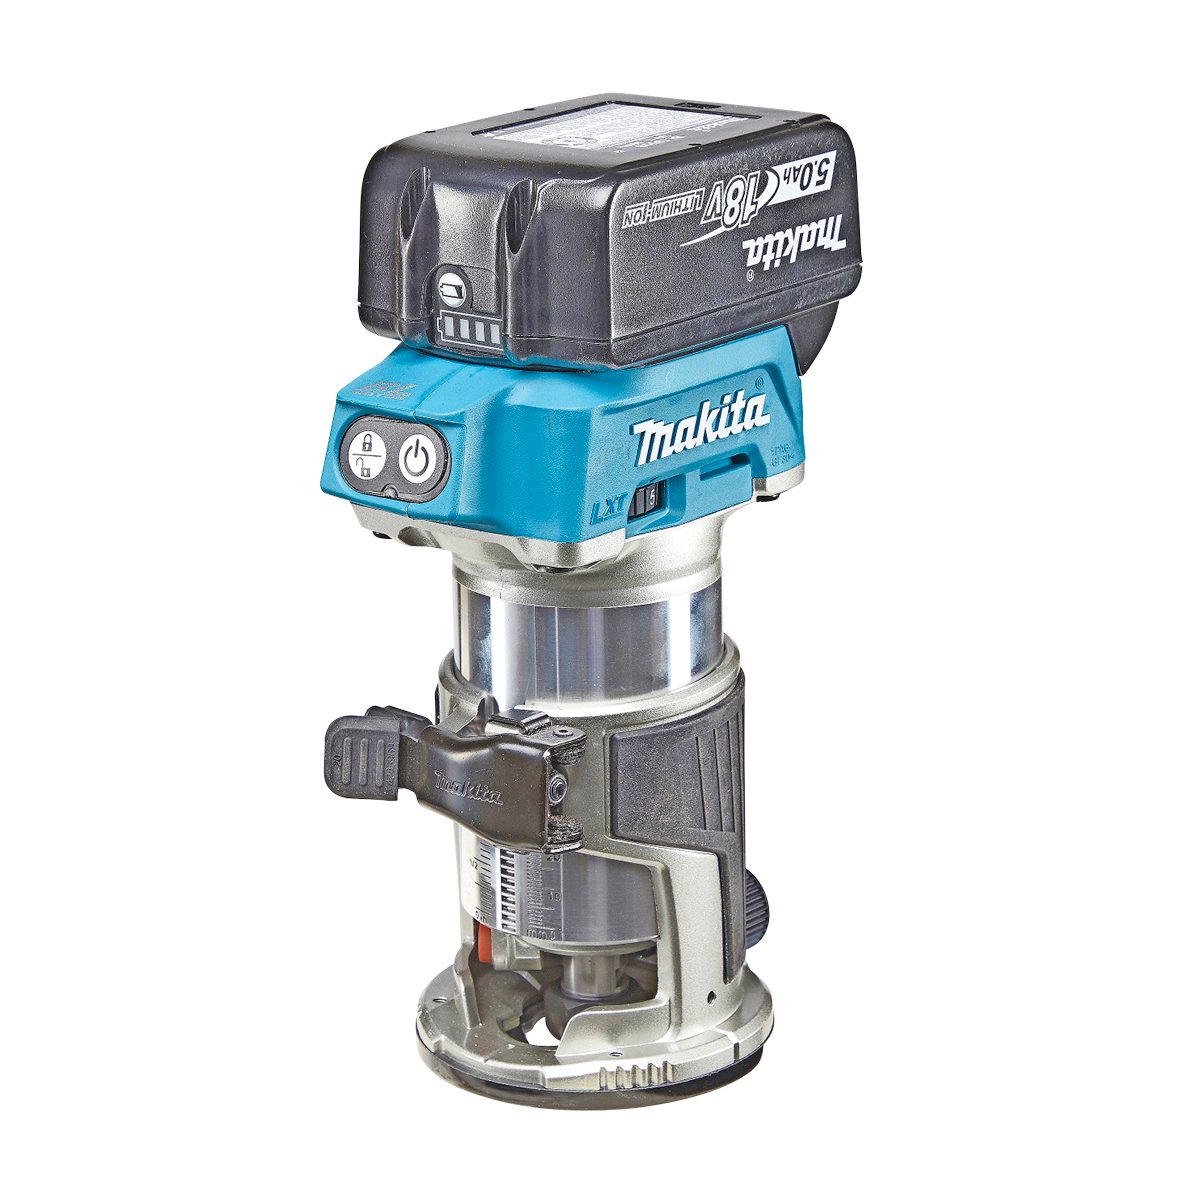
Makita (xtr01z)
$129 (tool only)
The Makita is the smallest router I tested, but it has a solid feel and a sturdy, mostly aluminum body. Its heft helps with the balance, and it made the smoothest cuts of the group. The rack-and-pinion height adjustment is unique to the Makita and great for rough height changes, but fine adjustments were harder to dial in.
Pros:
- Soft-start motor.
- Power switch safety eliminates unintended power-ups.
- As a kit, it’s an incredible value: two batteries, charger, plunge base, edge guide, all in a nice tool case for about $350.
Cons:
- Small baseplate.
- No micro adjustment.
- No electric brake
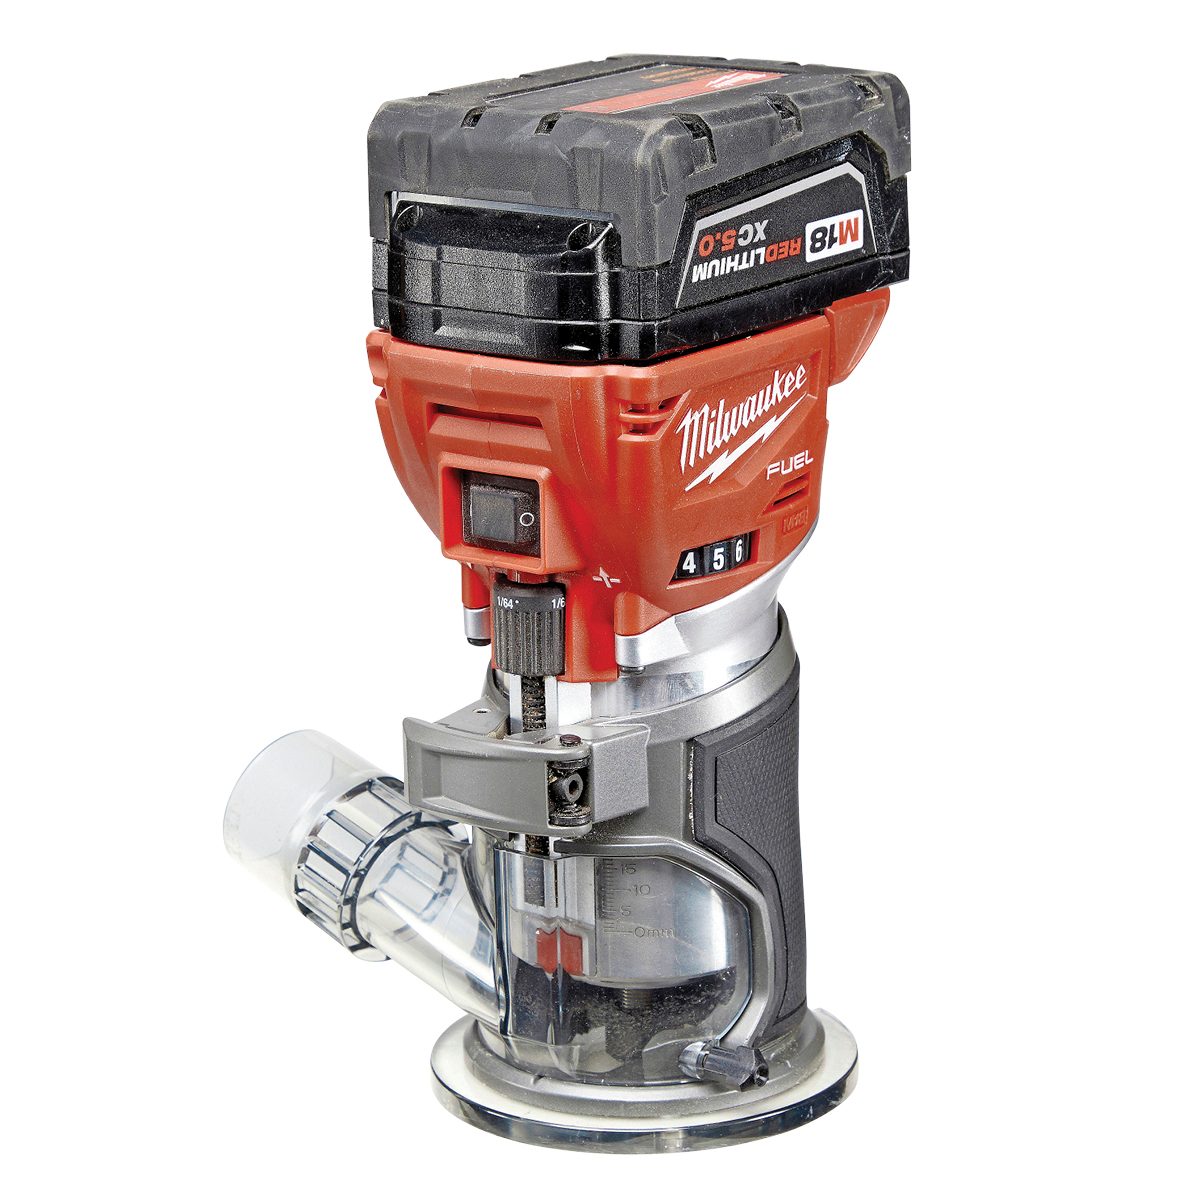
Milwaukee (2723-20)
$199 (tool only)
The Milwaukee has a comfortable rubberized grip for a solid, controlled feel. The 5AH battery gives a top-heavy feel, but the larger baseplate helps steady it on the work surface. The quick-release button lets you easily remove the base for bit changes. During my first cut the base shifted slightly, but I tightened the latch and it didn’t happen again.
Pros:
- The microadjustment knob moved the base smoother than others with a similar design.
- Includes a removable dust extraction port and two baseplates.
- Bit changes are simple and fast.
Cons:
- Out of the box, the latch needed tightening to keep the base from slipping.
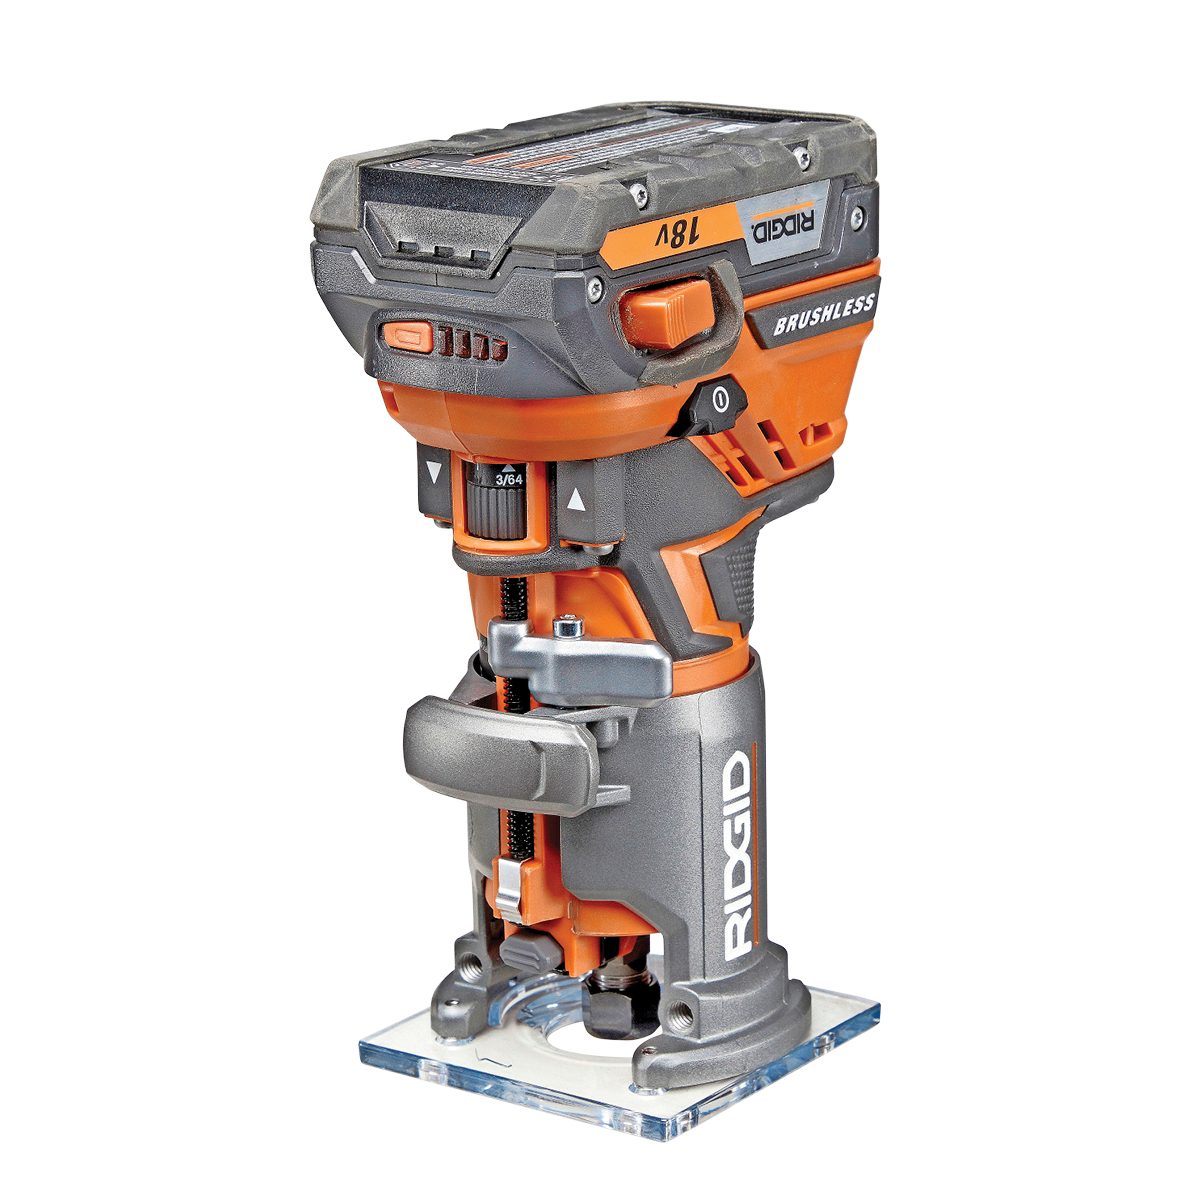
Ridgid (r860443)
$129 (tool-only kit)
The Ridgid has features similar to other routers and includes extras like an edge guide and soft case. The body is plastic and the base doesn’t have a rubberized grip, but it’s narrower and still easy to hold. This model chattered a bit on deep cuts, but was really smooth on shallow passes.
Pros:
- The tool-only kit includes an edge guide, a dust extraction port and an extra baseplate.
- This router affords the best visibility of the bit from both sides while you’re routing.
Cons:
- The switch is awkward to operate.
- I found it difficult to raise the bit against gravity with the microadjustment knob. I needed to flip it upside down to make the adjustment.
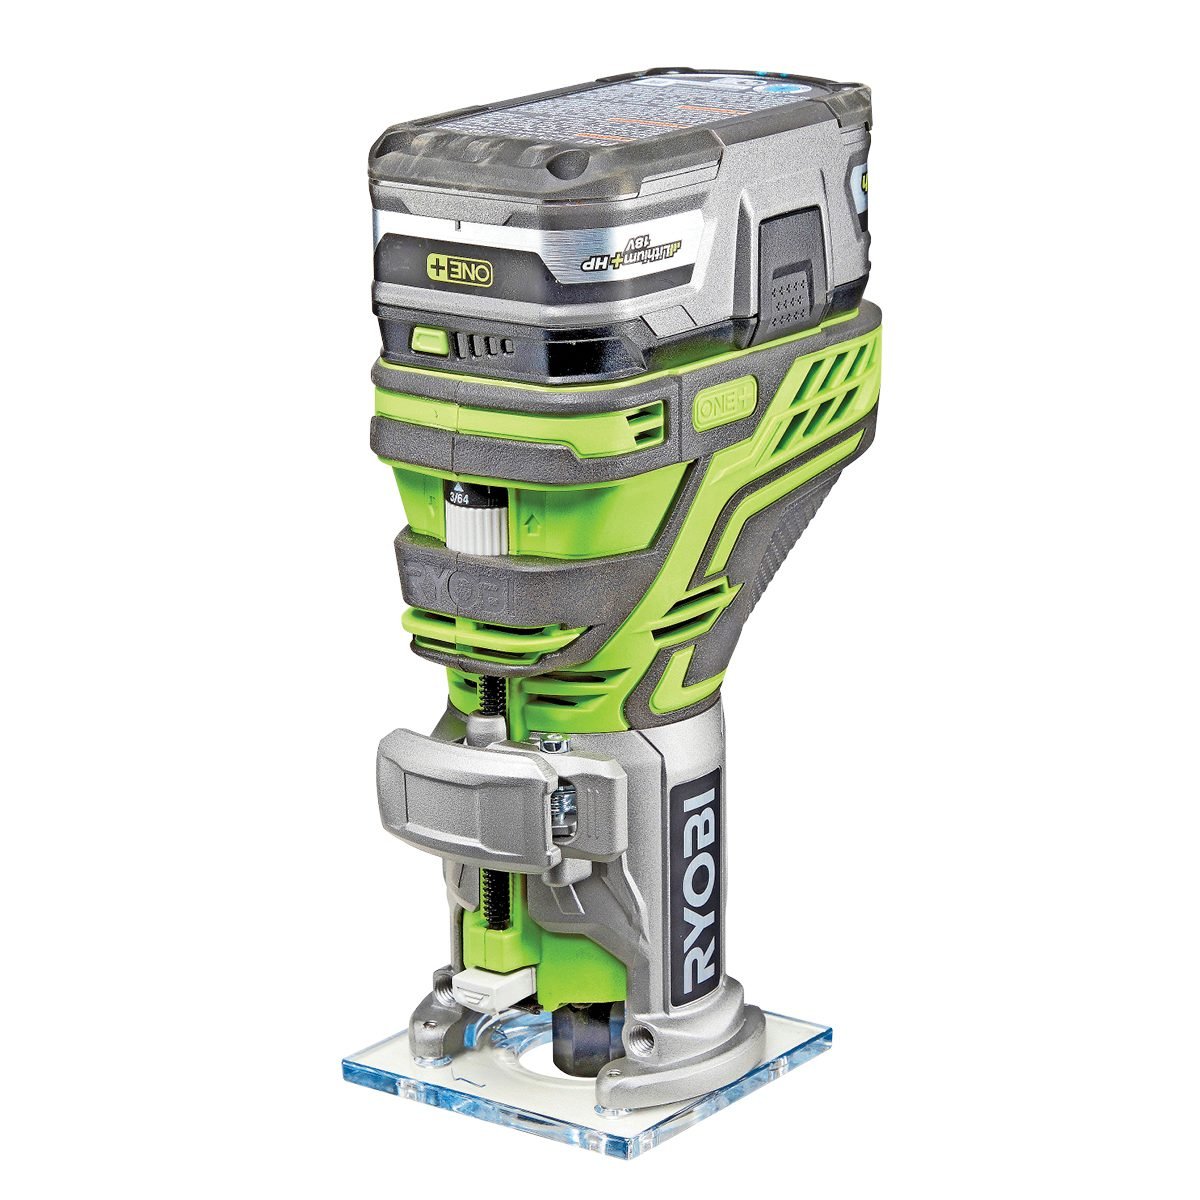
Ryobi (p601)
$70 (Tool only)
The Ryobi feels a little top heavy, especially with the smaller base. On deeper cuts it chatters quite a bit, but on shallow cuts it performs well. It has high-end features, such as a microadjustment and a quick-release lever. A plunge base isn’t available for this router. The Ryobi cuts really well for light-duty, shallow work.
Pros:
- The quick-adjust is integrated in the same mechanism as the latch that secures the base.
- Smooth microadjust mechanism.
- The value is hard to beat.
Cons:
- The grip zone isn’t where I would grip the tool while in use.
- The heavy battery and small baseplate make the tool feel unbalanced.
- The base is a little fussy to remove for bit changes.
The bottom line: Stick with the battery system you have
After testing these routers, I definitely have preferences. But honestly, there isn’t a big difference between my least favorite and my favorite. They’re all good tools that I’d be happy to have in my shop.
My advice? If you’ve already invested in a battery platform, get the cordless router of the same brand. The benefit of having extra batteries outweighs any other advantages.
Make A Better Router Base
Stabilize your compact router with this easy project.
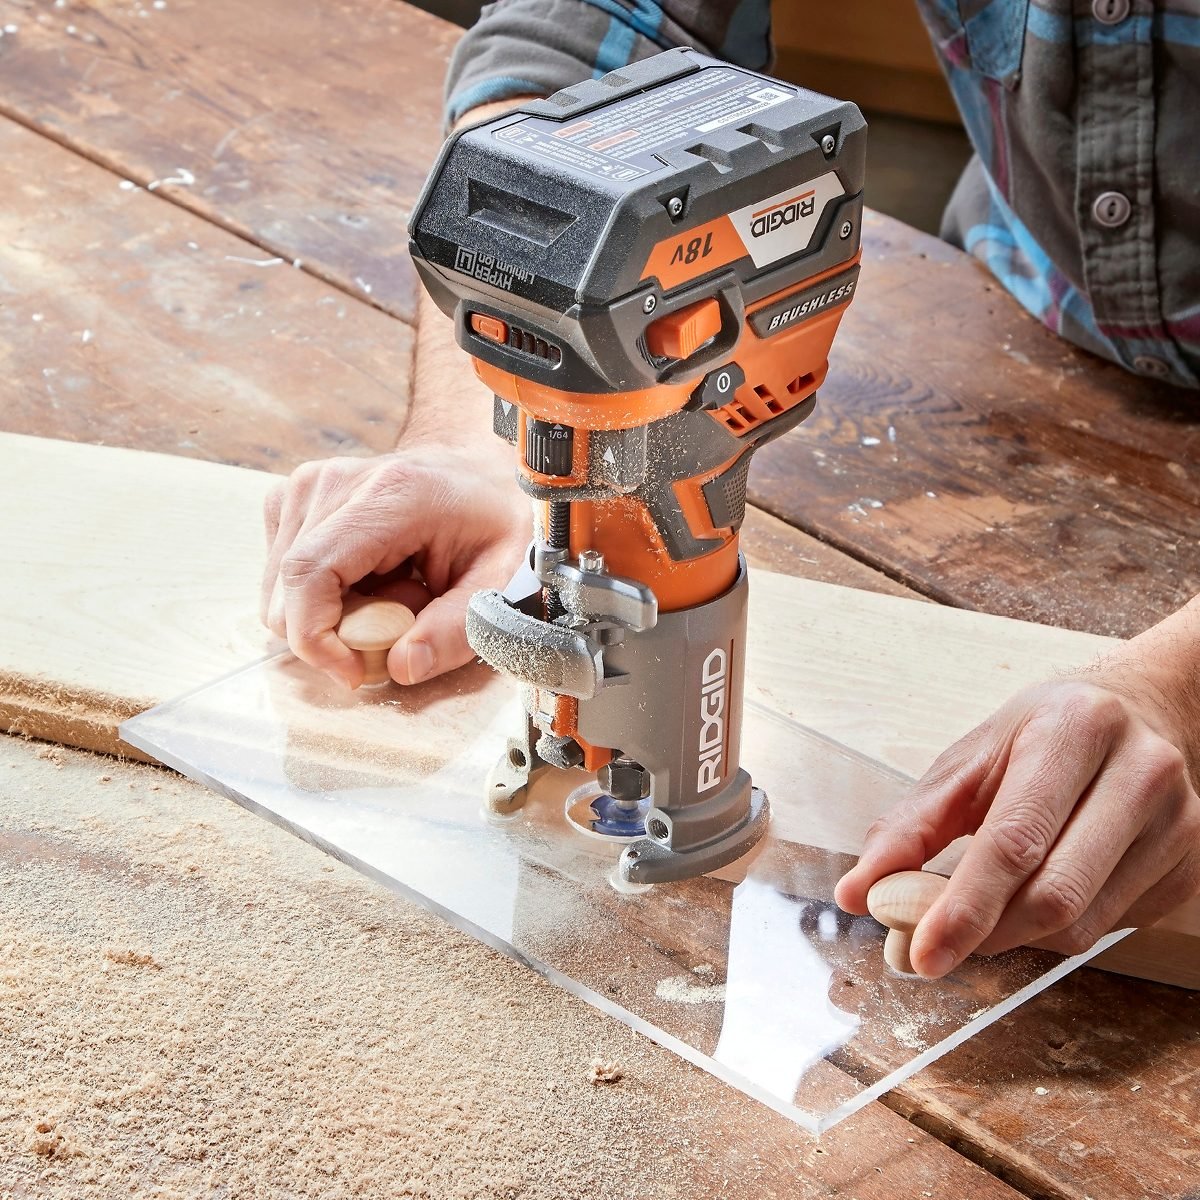
Compact routers have a small base. That, combined with one-handed operation, can make them feel slightly unstable. This simple oversize base with handles solved the problem for me. I built it in less than an hour with materials that cost about $20.
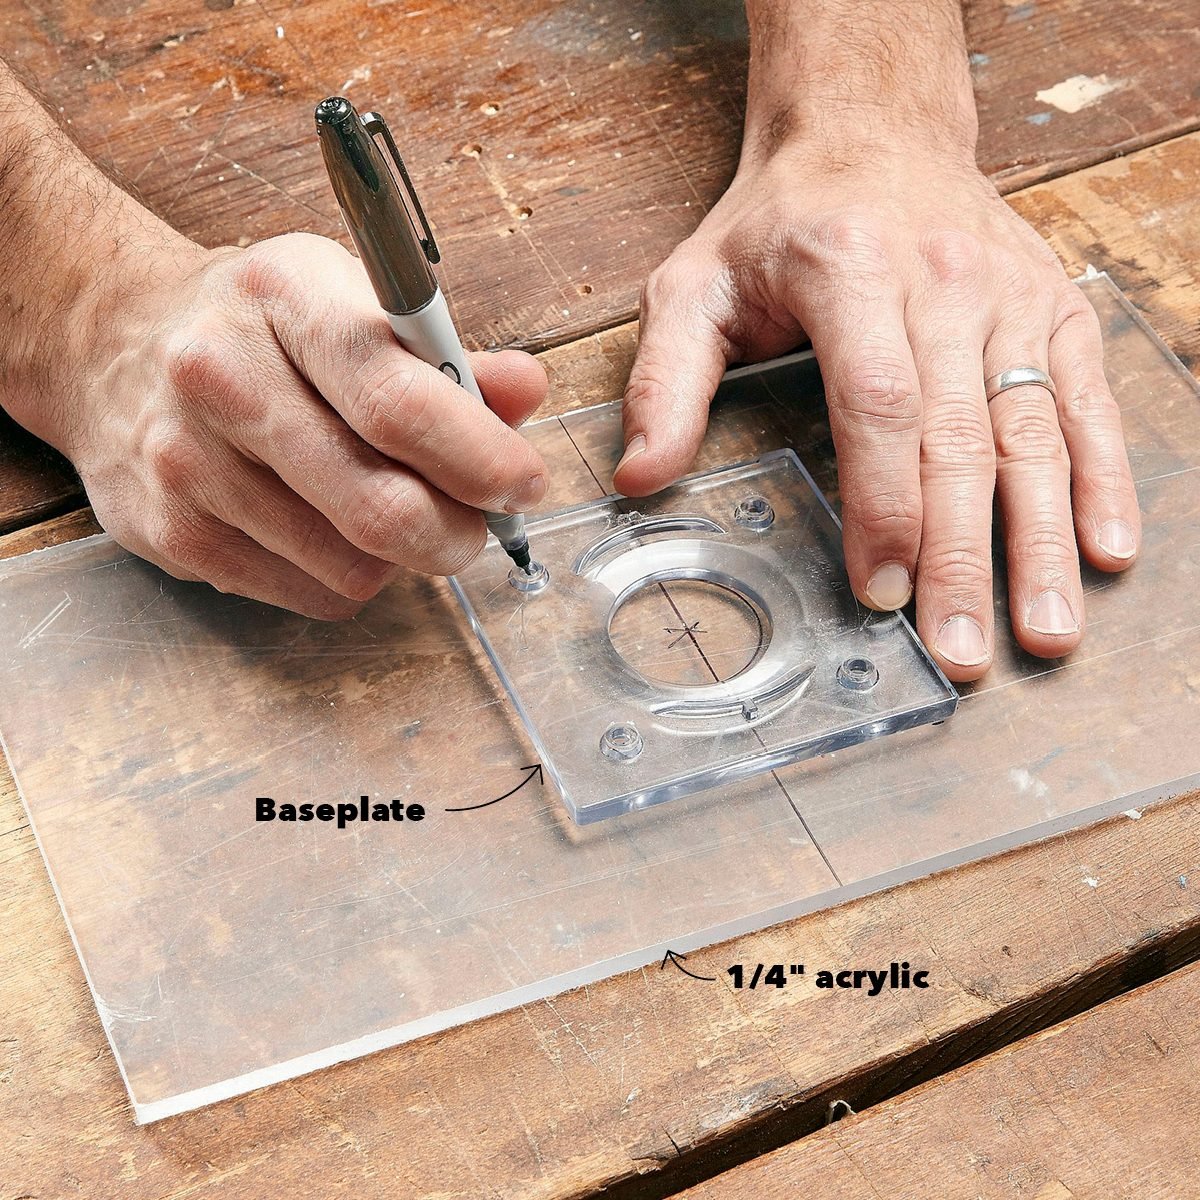
Locate the baseplate holes
Remove the factory baseplate and position it in the middle of a 6-in. x 10-in. piece of 1/4-in.-thick acrylic. Trace around the baseplate and inside the center hole, and mark the screw holes with a permanent marker.
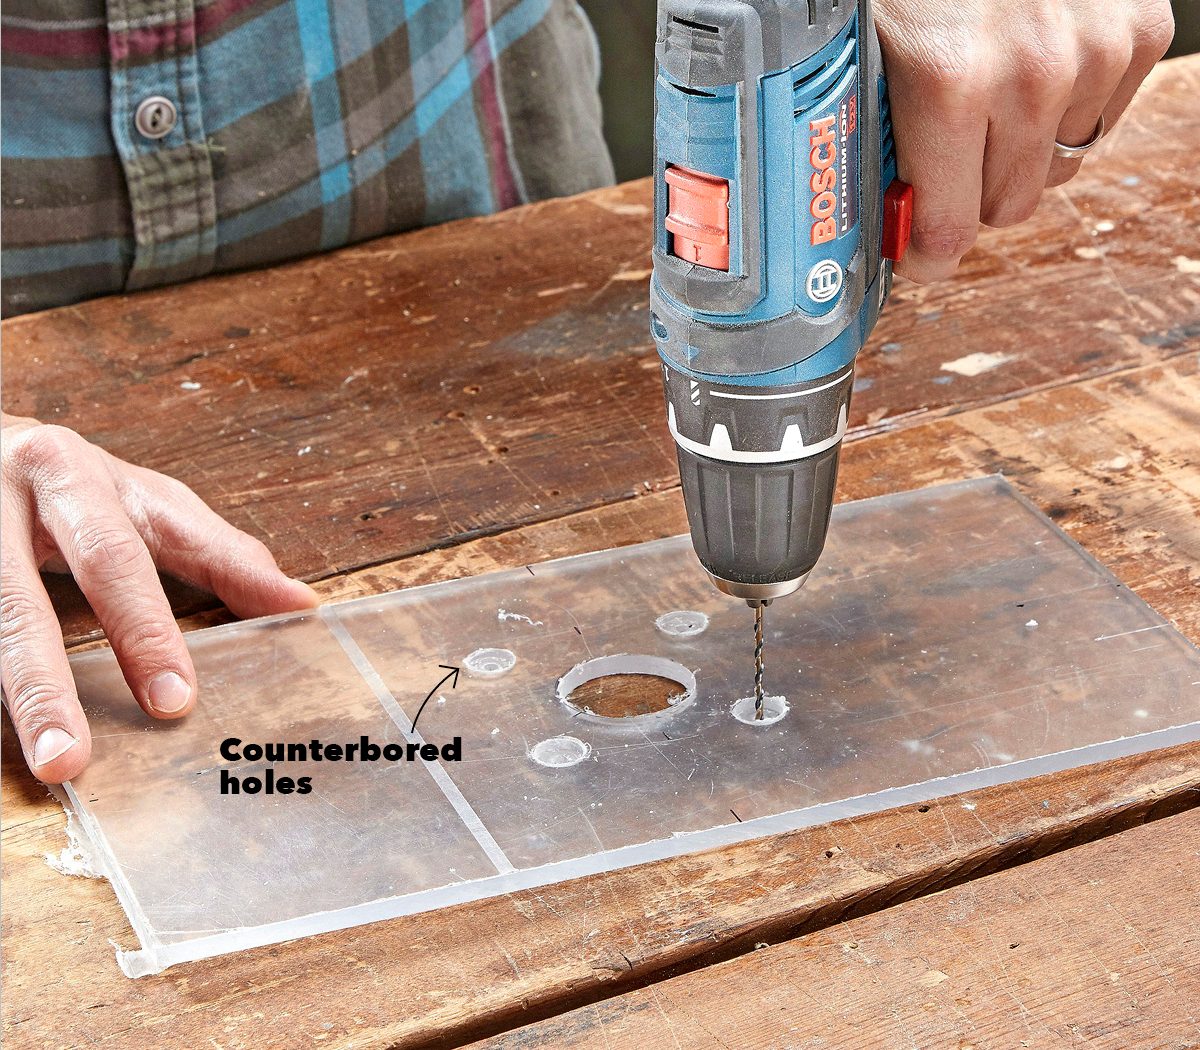
Drill the Holes
Use a 1/4-in. Forstner bit to drill partway through the acrylic at the screw holes. Drill just deep enough so the screw heads will be below the surface when you mount the plate to the router. Drill a 3/16-in. hole through the centers of the counterbored holes. Cut the large center hole with a hole saw or Forstner bit.
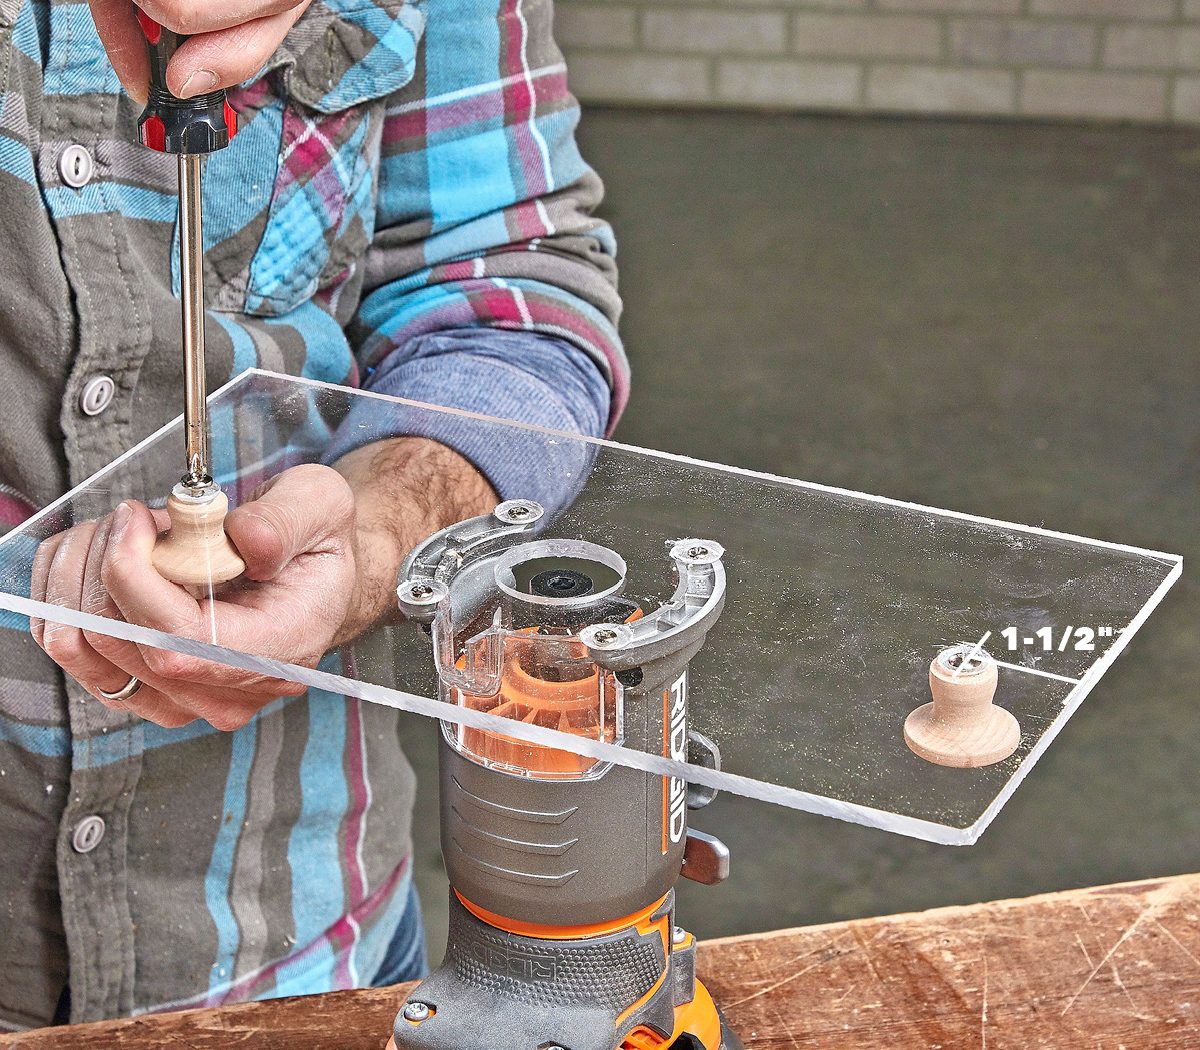
Add cabinet handles
Make two more counterbored holes, centered and about 1-1/2 in. in from each end, to mount the knobs. I attached wood knobs with short wood screws. If you use machine-screw threaded knobs, you’ll have to shorten the machine screws to make them work. Attach the base to your router using the factory screws.
No comments