
Two Essential Saw Cutting Guides
Overview of creating this DIY circular saw guide system
With these two saw guides, you can use your circular saw to make cuts that rival a table saw’s for speed and accuracy. Building the guides is a quick and easy project. You can complete both in two or three hours from one sheet of MDF or plywood.
We’ll show you how to build the guides and make sure they produce accurate cuts. You can get all the parts for both from a 4 x 8-ft. sheet of 1/2-in. MDF. We chose MDF for these clamp and cut edge guides because it’s inexpensive, stable and readily available at most home centers and lumberyards. Cutting MDF creates a nasty dust storm, though, so wear a mask and put a fan in the window if you’re cutting inside. Since you’ll use the factory edges as guides, inspect the sheet to make sure the edges aren’t dinged up or dented. Then handle it carefully while you’re getting it home to avoid damaging the edges. If you can’t haul a full sheet, ask to have the sheet ripped into two 2 x 8-ft. pieces that are easier to handle. You’ll also need wood glue, three No. 8 x 7/8-in. round head screws and one 1/4-in. washer. Here’s how to create a DIY circular saw guide system:
Square-cut guide
Build this handy circular saw guide accessory in an hour and use it the next time you need a perfectly square cut on a shelf or other wide board.
Straightedge guide

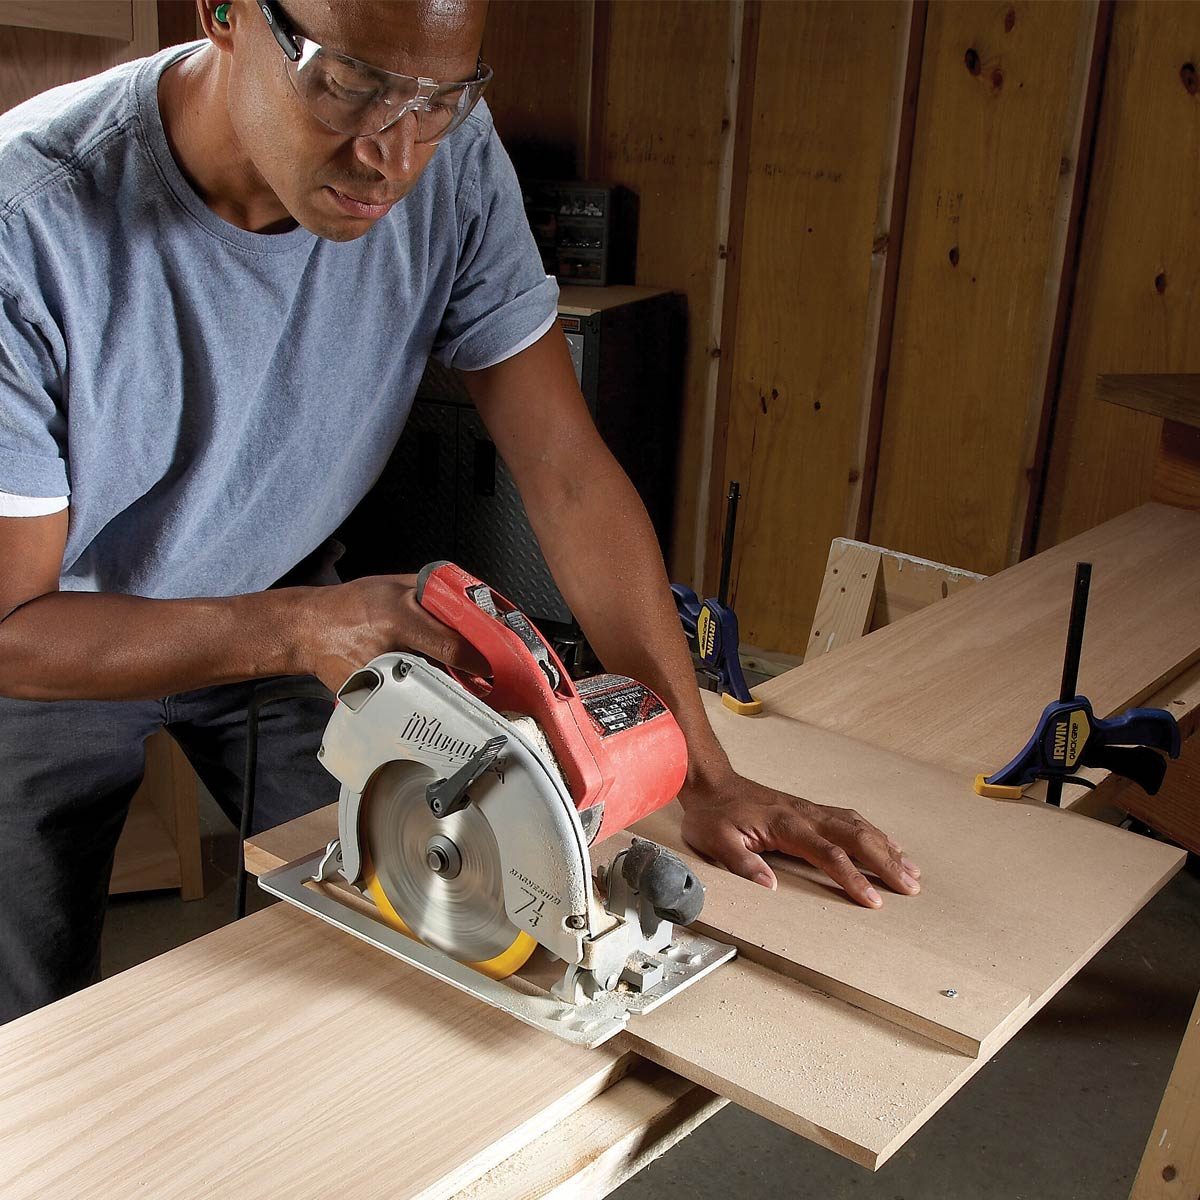
Cut big sheets down to size quickly with this straightedge guide. This is the perfect rip cut circular saw guide. To use this circular saw guide rail, line the guide up with your marks, clamp it down, and run your saw along it to make a cabinet-quality cut.
Required Tools for this Project
Have the necessary tools for this DIY project lined up before you start—you’ll save time and frustration.
- Circular saw
- Clamps
- Cordless drill
- Drill bit set
- Dust mask
- Framing square
- Safety glasses
- Straightedge
Required Materials for this Project
Avoid last-minute shopping trips by having all your materials ready ahead of time. Here’s a list.
- #8 x 7/8-in. round head screws
- 1/2-in. x 4 x 8 MDF
- 1/4-in. washer
- Wood glue
Straight-as-an-arrow cuts
Make wavy cuts a thing of the past with this easy-to-build guide. This straightedge guide allows you to make perfectly straight cuts up to 8 ft. long with your circular saw. It’s great for ripping shelves or cabinet parts from a 4 x 8-ft. sheet of plywood. Even if you own a table saw, it’s often easier to use a circular saw guide than to wrestle a big sheet of plywood through your table saw. You’ll customize the guide to your saw, allowing you to simply align the edge of the guide with your cutting marks and clamp it down. You don’t have to measure back from the cutting line as you would if you were using a regular straightedge.
Constructing this circular saw guide rail is straightforward. Photos 1 and 2 show how. The key is to make sure the fence is perfectly straight. Start by drawing a line 6 in. in from the edge of the MDF sheet. Saw along the line with your circular saw. Then flip the 6-in. strip (fence) over onto the remaining MDF and align the two saw cut edges. Clamp the fence in this position while you draw a fine line along the factory edge. You’ll use this line to make sure the fence stays perfectly straight as you glue and clamp it.
Flip the fence over again, back to its original position, and spread wood glue on the surface that will face down. Finally, align the factory edge of the fence with the line. Let the fence hang over the end of the guide by 2-in. (Figure A). Make sure it’s the end where you’ll start the circular saw cuts. This will help the saw get a straight start when you’re using the guide. Clamp the fence and let the glue set for 20 minutes. Then run your circular saw along the fence to separate the straightedge guide from the rest of the sheet (Photo 2).
Photo 1: Glue the fence

Glue the fence to the sheet of MDF, aligning the factory edge with the straight line. As you clamp the fence, make sure you don’t push it off the line.
Photo 2: Cut the guide

Run the saw along the fence to separate the base from the remainder of the MDF sheet. Now you have a guide that will give you perfectly straight cuts up to 8 ft. long.
Figure A: Straightedge Guide

Glue the fence to the base, then run the saw against the fence to cut the guide. The factory edge is used for the fence. To use the guide, simply clamp it to the piece you’re cutting, aligning the base with the cut line.
Right-on right angles
Make precision right-angle cuts quickly with this crosscut guide. This guide allows you to make perfectly square crosscuts on pieces up to 18 in. wide. Like the straightedge guide, the crosscut guide is customized to your saw so you can simply line up the edge of the guide with your cutting mark and clamp it. Then run your saw along the fence to make the cut.
Start by cutting a 22-in. square from the corner of the MDF sheet. Then cut a 3-in.-wide strip from the remaining factory edge of the sheet. Cut the strip into two 22-in.-long pieces. In one 3-in. x 22-in. piece, drill a 1/8-in. hole at one end and a 3/8-in. hole at the other. This will be the adjustable stop that you’ll screw to the bottom of the base. Photos 1 and 2 show how to build the guide. Start by aligning the edge of the stop with a factory edge of the base and attaching it with the “swivel” screw and the “adjustment” screw (Figure B). The critical step is making sure the stop is at an exact 90-degree angle to the fence.
Build the guide and make a test cut. Then check the cut with a framing square. If the cut isn’t square, loosen the adjustment screw and nudge the stop a bit. Then retighten the screw and make another test cut. Make a reference mark next to the stop before you adjust it so you can gauge the distance. Repeat this process until the guide delivers perfectly square cuts. Then drive another screw through the stop into the base, next to the adjustment screw, to lock the stop into place.
Photo 3: Align the fence

Screw the fence to the base. Align a framing square with the bottom edge of the base and clamp it. Then align the fence with the square before attaching it with screws.
Figure B: Crosscut Guide

Adjust the position of the stop under the base until the fence guide is perfectly aligned at 90 degrees. Next, learn some secret clamping hacks from woodworkers.


No comments