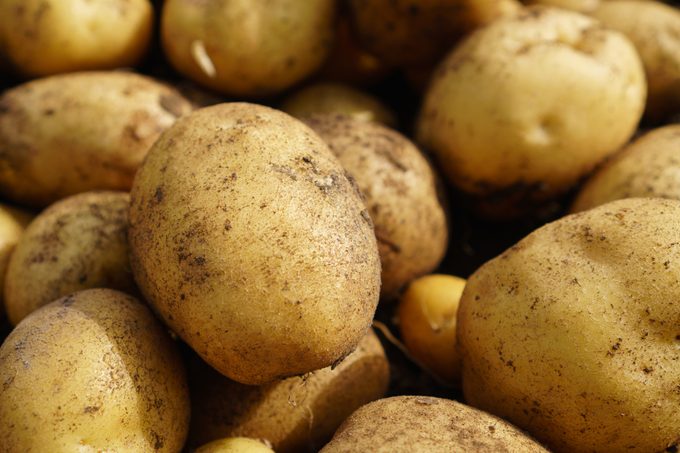
How To Grow Potatoes
Did you know genetic testing traces the origin of the potato to Peru and parts of Bolivia? Wild potatoes grow in the southern U.S. I grow mine in my small urban yard in the Midwest, in 20-gallon lightweight cloth growing bags called Smart Pots.
Whether you’re raising them in growing bags, in the ground or in a raised bed, read on to find out all you need to know about how to grow potatoes.
Types of Potatoes
Many gardeners grow a variety of early, mid- and late-season potatoes to ensure a long harvest. Besides those familiar brown- and red-skin kinds with white flesh, potatoes come in other colors, including purple, blue and creamy white.
Early season potatoes
- Harvest 80 to 90 days after planting.
- Norland has red skin and resists scab, a potato disease.
- Yukon Gold is a yellow, uniform, oblong potato.
Mid-season potatoes
- Harvest 90 to 110 days after planting.
- Popular varieties include French Fingerling and Purple Viking.
- Kennebec can be mid- or late-season.
Late-season potatoes
- Harvest 120 to 135 days after planting.
- Varieties include Purple Peruvian, Fingerling Salad, Russet and German Butterball.
Ways To Plant Potatoes
You’ll notice potato plants aren’t available at your local nursery or garden store. To grow potatoes, you have two options to start from: seed potato and potato seed.
How to plant seed potato
This is the traditional way to plant potatoes. Seed potatoes are cut from another potato. Each piece is about the size of an egg, with a few growth points (AKA eyes). Seed potatoes are readily available and certified disease-free at garden centers and from online seed merchants, which will have the widest selection.
You may be inclined to use a grocery store potato as a seed potato. Don’t. It may have been treated with a growth-detering hormone, or harbor disease.
If planting in the ground:
- Plant potatoes in early spring, two to three weeks after the last frost date. Select a sunny area with well-drained soil.
- Potatoes do best when the soil is on the acidic side, which helps control potato scab, a disease you won’t discover until harvest. Test your soil to determine its pH and see if you should take steps, such as sulfur application, to lower it.
- Add nutrients and improve drainage by digging compost, aged manure, chopped leaves or other organic material into the top 10 inches of soil. I also mix in Organic Espoma Garden-Tone, or a 10-10-10 mix of all-purpose fertilizer, according to label directions.
- Form the soil into a hill or mound six to eight inches high for each seed potato. Plant cut-side down, about six inches below the soil surface and 12 to 15 inches apart.
- Water the new plantings.
If planting in a container:
- Ensure your container has holes in the bottom for drainage. A five-gallon bucket is a good size. Just drill or punch holes in the bottom.
- Use a 50-50 mix of topsoil or potting soil and compost. Add three or four inches of soil mix in the bottom of the container.
- Place two or three seed potatoes in each container. Cover with potting mix, keeping the leaves off the seedlings an inch or two above soil level.
- Water.
How to plant potato seed
Although there are other potato seeds available, the Potato Clancy was named the first All-America Selection (AAS) potato seed in 2019. Judged highly productive and disease-free, it’s available at many online seed retailers. From my experience, Clancy potatoes have different skin hues and are not all the same size.
- Start potato seeds inside, six weeks before planting outdoors.
- Sow seeds in two- to four-inch pots filled with a good-quality potting mix. Moisten the soil and sow one or two seeds 1/4-in. deep per pot.
- Keep seedlings about an inch below a light source, such as fluorescent shop lights or grow lights. Raise the light as the plants grow.
- Keep the soil moist but not sopping wet.
- Transplant outdoors when the seedlings are three to four inches tall. Remove the plant from the pot and plant two or three inches deep, with just the top few leaves above the soil surface.
How To Grow Potatoes

- Add a layer of mulch — like shredded bark or chopped leaves — around the plants to help cool the soil, retain moisture and discourage weeds.
- As the plants emerge, hill up the soil around them if in the ground. Or add soil mix to containers, leaving a few inches of leaves above the soil surface. This prevents the plants from getting sunburned or green skin and developing a bitter taste. You’ll probably need to do this two or three times before harvesting.
- Water deeply during dry spells. This helps develop potatoes of similar size.
- Watch for potato insects and diseases. Colorado potato beetle, flea beetle, leafhoppers and wire worms are common potato pests. To avoid disease, be sure to plant certified disease-free seed potatoes and ensure your soil is on the acidic side. Check with your county extension office for more information about controlling potato insects and diseases in your area.
How To Harvest Potatoes
Harvest potatoes when the tops of the plants turn yellow and start to dry. “New” potatoes get their name because they are harvested sometime before maturity.
Use a garden fork or spade to dig up the potatoes, being careful not to cut or slice them. The damaged ones should be eaten first. Cure the harvest at 65 F to 70 F for a couple of weeks before storing.
Store potatoes at about 45 F. They can be stored up to nine months, depending on the variety. Remove any eyes or sprouts before eating. Peel potatoes with greenish skins.
No comments